Thursday 8 December 2011

texture - references

http://image.shutterstock.com/display_pic_with_logo/239779/239779,1248841344,42/stock-photo-stone-floor-texture-34423987.jpg


http://www.filterforge.com/filters/1957.jpg


http://www.designyourway.net/diverse/woodtexture/Wood_Texture_by_xNickixstoc.jpg


Editing - video creation - Premier Pro

Open premier pro - select new project


Select project settings (view settings)


Select decoder presets - 720p 30fps


Enter work area - import


Select folder containing frames - select first frames - tick numbered stills (will stitch together all still images in sequential number sequence


Drag down from left to video - zoom in if necessary


Render work area


Wait for scene to be processed to run smoothly


Test view


Export media


Select codex method etc to produce video file to test view


Editing and stitching together of different videos and scenes and adding effects all done in group. This is blog to show understandings of premier pro
Effects can be added by dragging to work area on top of video clip or highlighting video clip and adding to effects work area - editing settings
Videos can be joined by adding to work area and placing directly after or even overlapping etc

Rendering - notes

Rendering involves producing final images or videos to produce you r work at its finished quality
Rendering can involve many different methods
Render testing as referred to in blog involves rendering single frame of working viewport to check appearance
Thousands of settings and adjustments can be made

used multiple render tests to adjust lights in scenes to achieve desired results


Involved adjust colour and brightness to make sure lights fitted purpose


detailed setting changes for final render sequences

Quality not only needs to be considered for appear but for production time aswell
Guildhall sequence single frame required 1hr 20mins
for single images this is exceptable however for animations this can delay projects exponetially

Mental ray render - all medium settings (default)
No final gather - global illumination has been turned on and both are not required
Both indirect illumination processors and will simply repeat each other (slightly differently)

Set in render window to render camera (use padlock symbol to lock to this)
active time segment

1280 x 720 pixel ratio

Save file path - save as targa frames - to be join together in premier pro
                          if rendering as video file has to be completed in single session - frames can be rendered individually across a network or at different time - if computer fails only lose current frame not whole file

Selecting active time segment will render entire frame sample shown in work area - shrink and increase size via Ctrl + alt right click on timeline to extend shrink end time - ctrl + alt left click on timeline to extend shrink start of timeline

Texturing - road texture

Obtain asphalt texture


Import into photoshop


Add white boxes to new layer


Tuen outside boxes yellow


Change layer to difference (for realistic blending) add slight blur to strip edges


Use as bitmap (collapsed)


Apply to road section


Adjust size to gain required road appearance


Modelling - interior - details - light switch + remote


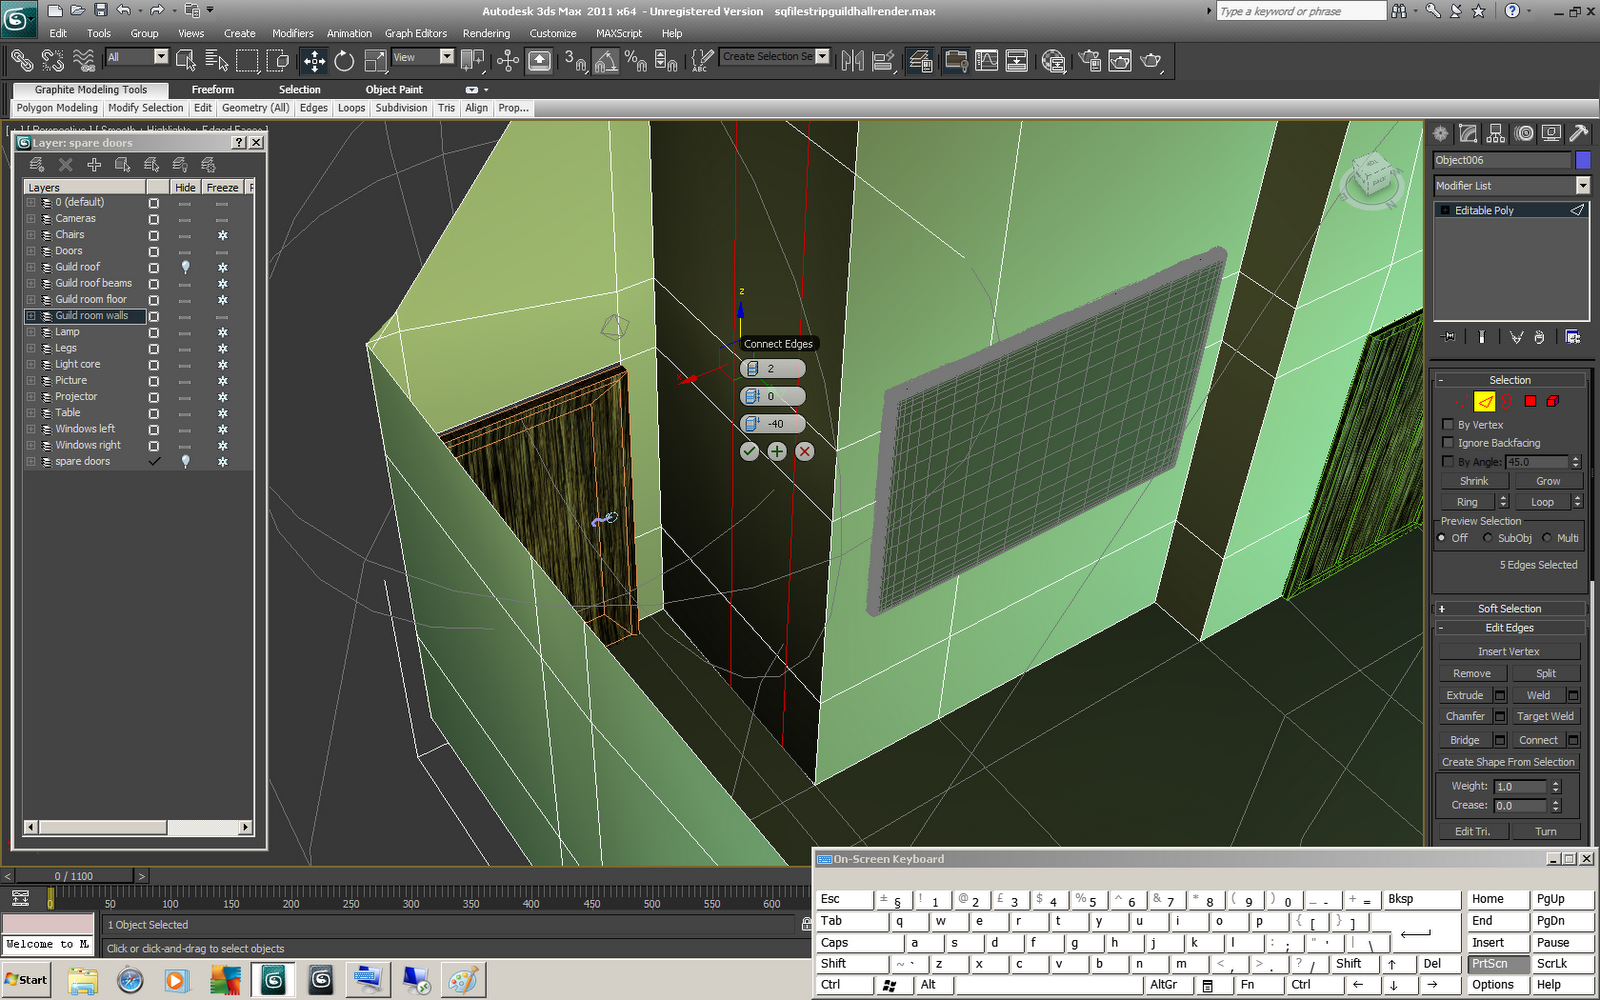
Use connect to add geometry to wall where light switch will be
use camera view to check positioning and six (can either be done precisely now , or quickly adjusted at a later date if required)


Select polygon - detach as clone (as to not remove original)


Extrude polygon forward


Apply bevel to obtain shown results


Add geometry via connect to add vertical lines
On bottom and top inner polygons - highlight - inset - extrude inwards as shown


Apply more geometry via conect


aim is to create geometry to allow for two vertical slits to be made (boxes via extrude polygon inwards)


Apply chamfer to slits


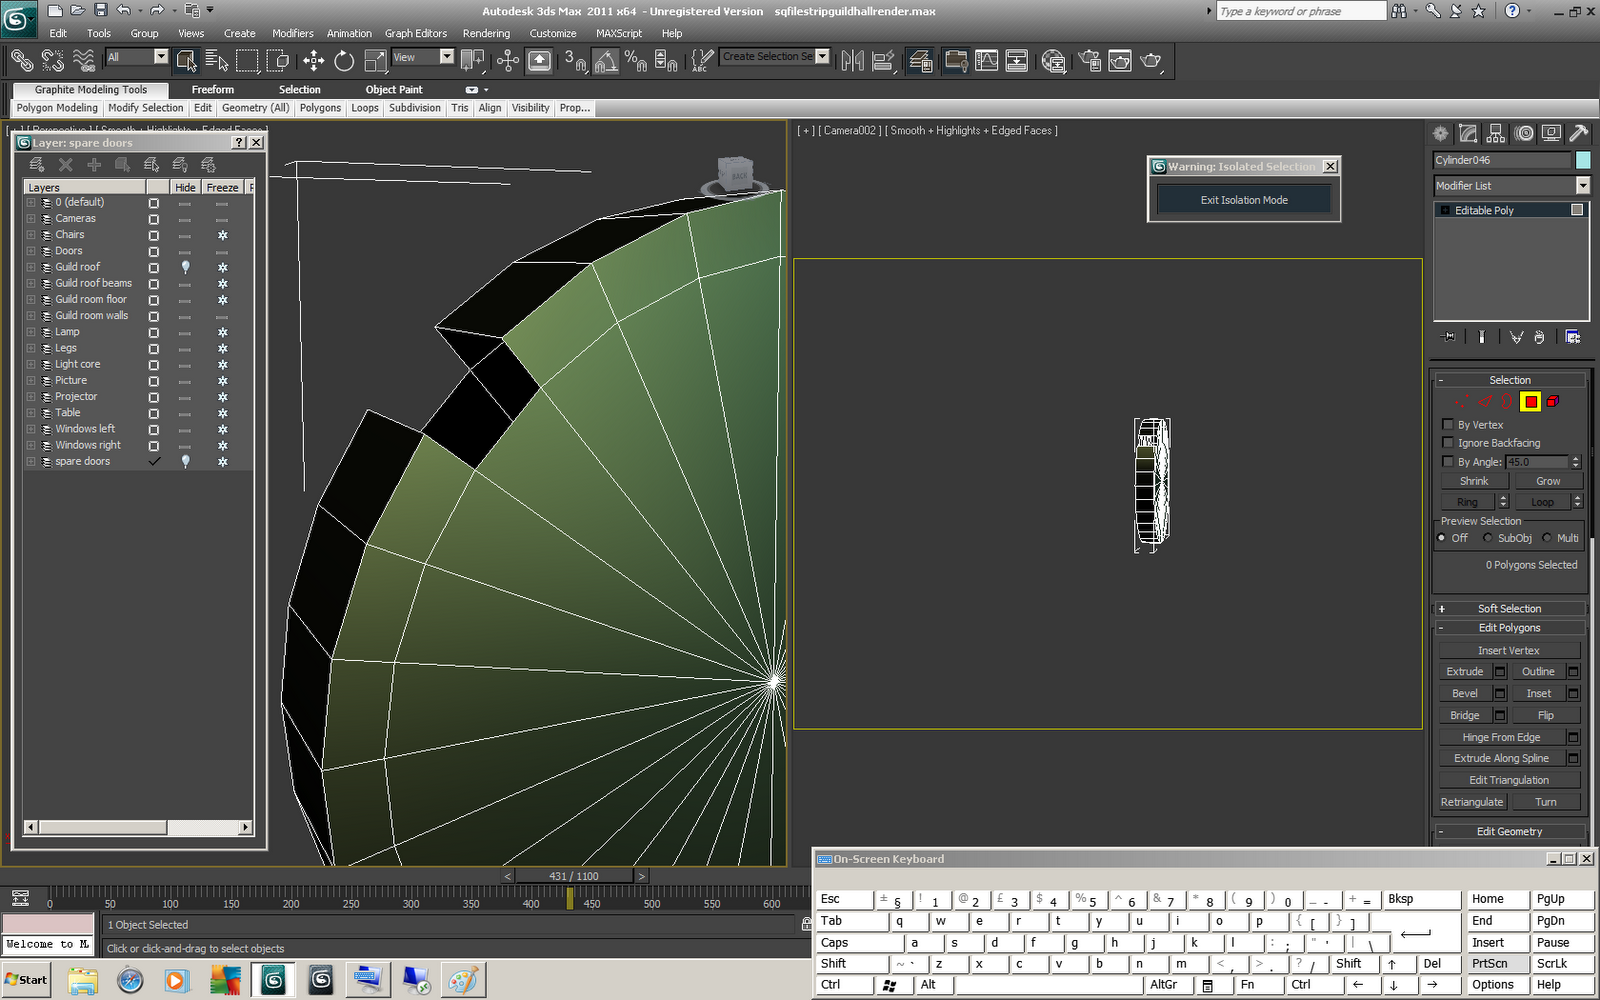
Create cylinder (in isolation mode)
2 cap segments
Editable poly
Highlight inside segment - loop selection - same for opposite side


Scale up (2 axis only) to push out nearer edge


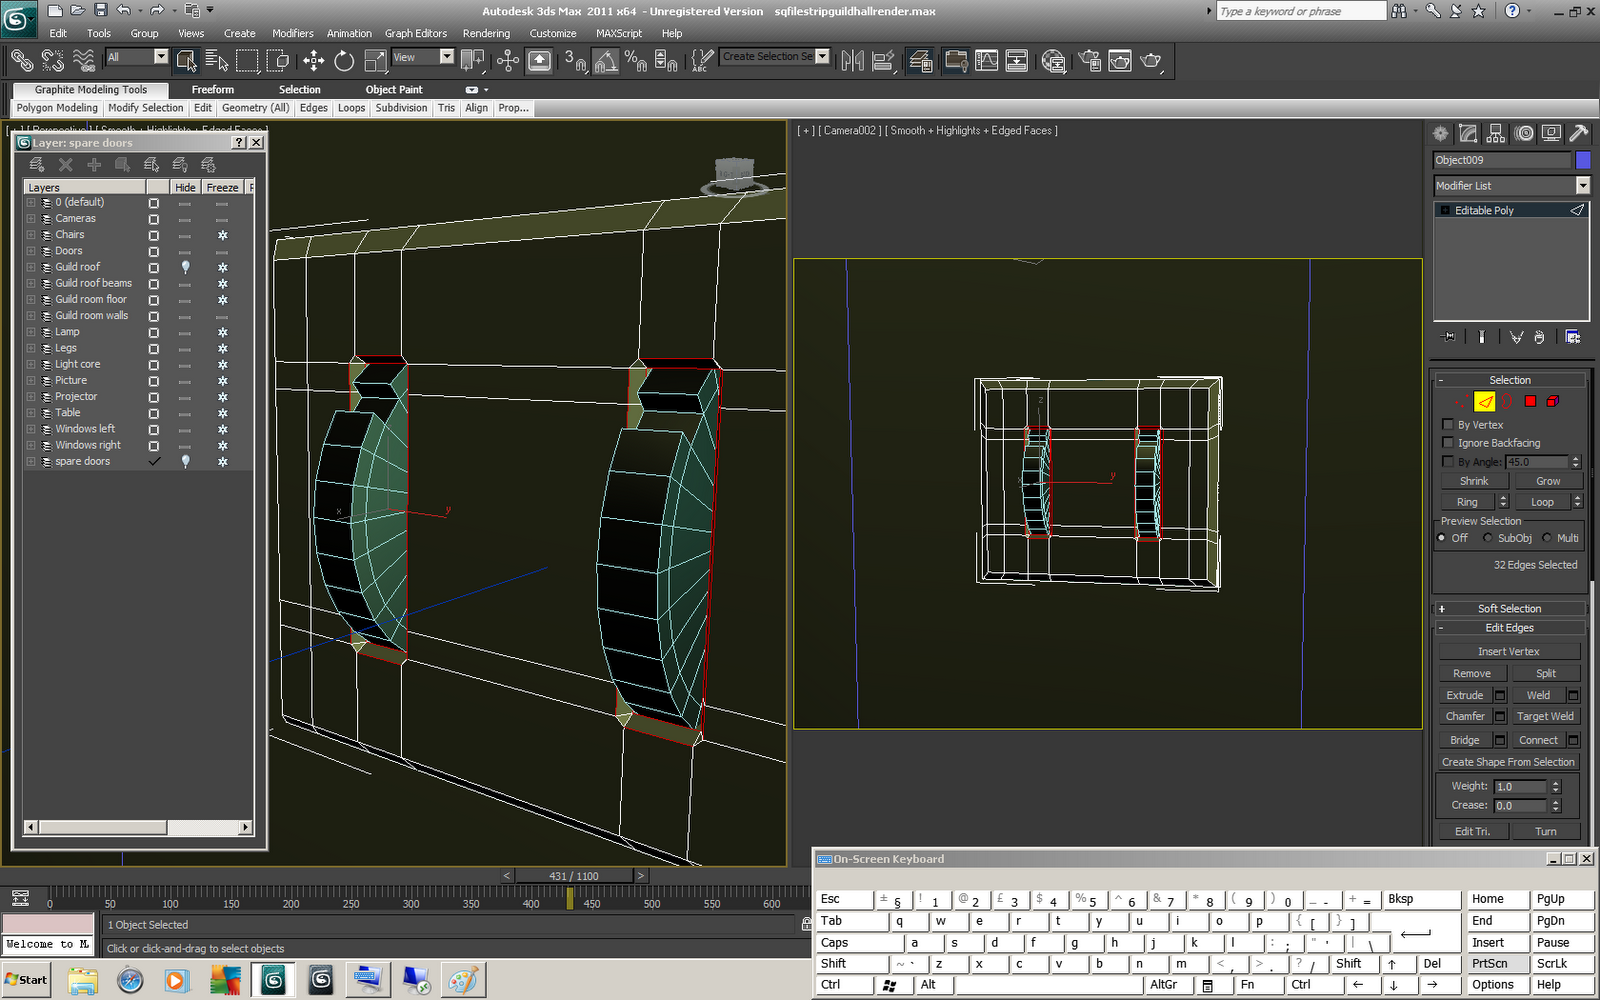
Remove 3 polygons to create gap as shown


Bridge and cap to not leave any gaps but leave indentation


Attempted to apply turbo smooth but did not suite design


Exit isolation mode and place in position - copy geometry to other slit


Highlight inside of indentations on light switch box + then afterwards separately on circular switch
When geometry is highlighted scroll down to material ID change to unused number for both switches and switch box


Create to materials one self glowing blue - other dark metal - put material sub object into slate editor - connect materials up - on first material (dark metal) leave as standard - on second (sub) material (blue glow) change number to fit with previous polygon material ID change
Apply material to light switches + box


Render to test (apply lens effect to material as before)

Time saving method used in this scenario - copy blue glow material from lamps material - use same material id as glowing lamps - lens effect already in scene will automatically be applied to same material id - hence glow already know to have correct settings and will work


Although not clearly shown in screen shot - animation is applied to light switch to rotate to lower indentation


Over same time main light intensity is animated to gradually lower with switch


In animation projector is planned to be turned of and screen retracts
This needs to be seen as happening realistically not randomly


Create box - place on table - position as required


Enter isolation mode - create same indentations as on light switch - apply same material ID as glow on light switch


Create cylinder place top left button position - highlight side polygons - change material ID to glow material same as light switch


Tools - array - 2 dimensions 3x8
Preview and accept if correct


Delete cylinders as required to only leave ones required to create pattern
Apply same material to all components same as light switch


Animate buttons by simply lowering into remote