Thursday, 8 December 2011

Modelling - interior - doors + maintenance hatch


Empty doorway in scene requires filling


Decided to use previously created doors to save time


Positioned and scaled size


Animation starts from open doorway facing away from door
Placed door inside gap (scaled to fit)
Highlighted door polygons (standard created door in scene is created with frame) detach


rotste door and position to be viewed as open (increased angle until not viewable by camera in doorway


Bridged geometry (previously left as very narrow doorway shape) to create maintenance panel (as described in plans)


Capped and detached polygon - applied shell and material


Modelling - interior - Main light lampshade


Added main light to scene over table to act as light design to illuminate room for normal situations (not mood lighting but main lighting) - colour must fit with outside appearance


Creating lamp shade created plane in position - 4x4 polygon geometry


Add displacement modifier to modifier stack - plane mode - scroll down to image - map - select - in map menu add gradient ramp


Select instance to create direct link


Turn gradient ramp to radial - since gradient ramp is directly linked to displacement black is translated to 0% displacement - white is translated to 100% displacement
Overall displacement can be controlled by displacement strength (overall distance of displacement)
Details of displacement can be manipulated via linked gradient ramp
Shown results required increasing plane segment amount significantly - 200 x 200 or greater
More segments = more geometry
More geometry = more detail to work with
More detail = smoother transition + better visuals + more processing


Enter isolation mode
Once desired results are obtained - apply shell modifier - apply FFD modifier (free form deformation modifier)
This tool creates box that surrounds geometry - each corner (node) can be manipulated
FFD 2x2x2 = 2 height x 2 width x length = just corner manipulation
Since creating lampshade freehand - (work as i go for more spontaneous results) decided to apply FFD 4x4x4 to allow for more detailed manipulation if required


Exit isolation mode - adjust position + size if necessary


Placed main light inside lamp shade - adjusted accordingly

Animation - guildhall


Remove all geometry that isn't involved with guild hall (all geometry particle systems etc that cannot be viewed from inside the room


Setup initial camera starting from inside doorway - (moved perspective view to required position - ctrl+c to create target camera at view position)


Animated as before using auto key to move camera round scene - target independently first - then camera independently after


In planned scene camera looks at light switch on wall - however due to shape of wall and lighting positions may not be clear to see what is happening (not clear to people unfamiliar with scene - decided to add very low intensity light to help make more visible for benefit of viewer


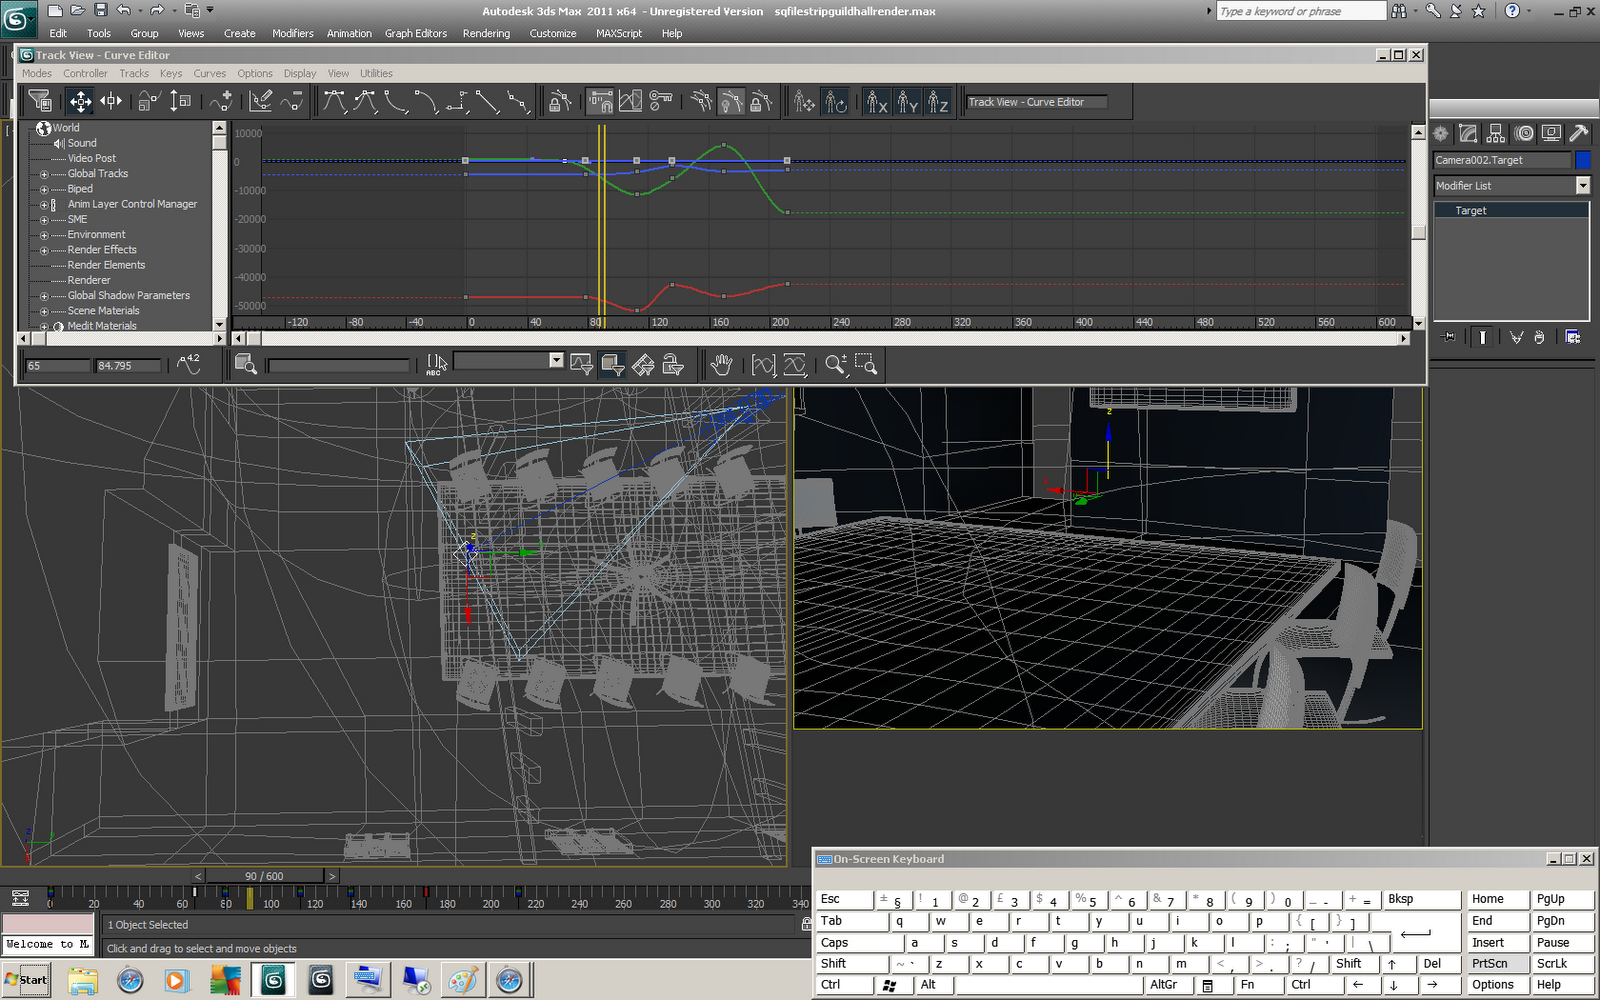
After creating rough guided animation turned to graph editor to fine tune timings and placements for each component.


Viewing from above (for placement) + viewing camera directly (for view) can allow for adjustments whilst maintaining desired results i.e. important to view both as they can directly effect each other - changing camera position will effect obtained view and vice versa


Screen shots shows making adjustments is z axis of target to view table + canvas more directly


Screen shot shows using scale tool - highlight keys to be scaled - select scale tool (top left four along on horizontal tool bar) select all keys to be scaled - scrub left and right - scale tool locks vertical positions and relative scale of keys to each other so they all move in relative scale to each other


Screen shots show trying to create smoother camera rotation to light switch


Screen shot shows editing z axis of camera to view remote correctly


To animate projector screen simply highlighted bottom edge geometry of projector (plane geometry) turned on auto key - applied key (for start point - adjusted timeline - raised bottom edge of geometry to effectively shrink planes height (raise projector screen) add keyframe
Go into cure editor as before to adjust timings


Lighting - exterior - windows


Windows in scene need to be lit to show rooms inside have lights on
First attempt put omni light in each room


However varying results - lots of adjustments + extreme amount of processing required using this method


Next method - replace window glass with standard material - apply light yellow self illuminate.
More uniform results (appearance of room filled with light) + lot less processing required


Adjusted while looking at render tests


Applied hair and fur modifier tho grass section to create grass appearance from acute angles
Many render tests and setting tweaks to obtain required results


Lighting - Hallway


Hallway requires lighting - geometry already created for lamps - light sources need to be placed
Created omni light, shift + a + click on lamp box - move to central position


Render test - adjust as required


Render test not only close up but far away swell for different perspective


Repeat process for other 2 lamps (use instance so all 3 can be controlled by one)


In viewport will look too bright - however when rendering results are as required


By default lights will light entire scene (no matter the size)


By turning on near + far attenuation can control how far the light travel in the scene as to not interfere with other light sources - leaving off decay gives greater control
Intensity may require increasing to counter light "lost" from decreasing attenuation size


Animation - intro scene


ANIMATION

Change viewport setup to two views -- view - viewport configuration - layout - change to 2
Preferred method of camera placement:
            alt + w = single viewport view - line up view as desired for camera - ctrl + c = creates target camera on that view - assign that view to right screen - use left scene as perspective view

Standard preferred setup is 50mil focus depth


For cameras auto key is sufficient - turn on on autokey
press key icon button every time major move is made - (not necessary in auto key but good practice)
highlight camera target (NOT CAMERA ITSELF)
Sequence time 0 - press key button - move timeline to predicted amount - move camera target to new position
New sequence time - press key button - move timeline to next step - move camera target to next position
Repeat this sequence to predict time/position correlation through sequence
Use left view to manipulate position - use right view to view results


Repeat process with only camera selected (NOT TARGET) while programming camera sequence/position - target of camera will follow its programmed route
Use right hand view to see to help align with target camera (this is why align target first)
IMPORTANT - do not worry about time worry more about adding necessary key frames (points in time) and aligning am era and target to gain required views


Once sequence has been programmed play sequence (play button) to see sequence in real time (default setting is 30fps ~ 30fames per second)

Curve editor - curve editor shows all animation details and their transitions as lines
x axis = time
y axis = transition amount

Highlight - camera and target - then enter curve editor
Default display will be highlighted objects movement [no rotation was applied due to using target camera and moving target separately which makes task a lot simpler]

red line = x axis
green line = y axis
blue line = z axis
yellow vertical dual line = place in time (lines surrounds frame)

if individual editing required simply only highlight target or camera to just display its curves

Each curve is controlled via points in time = keys - the key frames created earlier - transition between these points using auto key = smooth in and smooth out (which are desired results)
All these settings can be controlled and manipulated within curve editor settings
Direct curve editing consists of moving keys back and forth in time and vertically for transition amount
Use tools and manipulate accordingly


Play through sequence repeatly to get desired results


Decided to align camera to programmed fireworks i.e. adjust camera timing to fit finished fireworks
Options are to set camera then align fireworks as both can be achieved - all about preference


IMPORTANT
Once key frames are set TURN AUTOKEY OFF otherwise ANYTHING done in scene scan be altered to fit time frame currently selected - i.e. if you leave things on frame 234 and then move piece of geometry - geometry will gradually move from original position to new position over 234 frames if key frame occurs


Screen shot shows adjusting camera in time line. Sudden pitch in z is target camera looking at fireworks - simply moving the 4 keyframes controlling this movement can change when the camera looks up by how much and how quickly


For animation + rending purposes files were stripped (removed of all unnecessary geometry materials and effects) - less to process = faster rendering and smoother animation scrubbing


Viewed animation from perspective view swell to look for camera placement problems
camera drifts off path moving towards building


Adjust x axis amount in timeline while viewing camera to adjust